The crisp, clean look of a white background is a photographer’s staple for product shots and portraits. But what if you want to place your subject on a different background, or achieve a transparent background for web design? Thankfully, Photoshop offers several methods to edit photos to remove a white background, some quicker and easier than others.
This guide will explore four free ways to remove a white background in Photoshop, catering to both beginners and those with some editing experience. We’ll delve into the tools, steps involved, and address potential challenges you might encounter.
Before We Begin: A Note on Complexity
The success of these techniques depends on the complexity of your image. Solid white backgrounds with clear subject separation are easiest to handle. Busy backgrounds with textures, hair details, or objects touching the white background will require more refining.
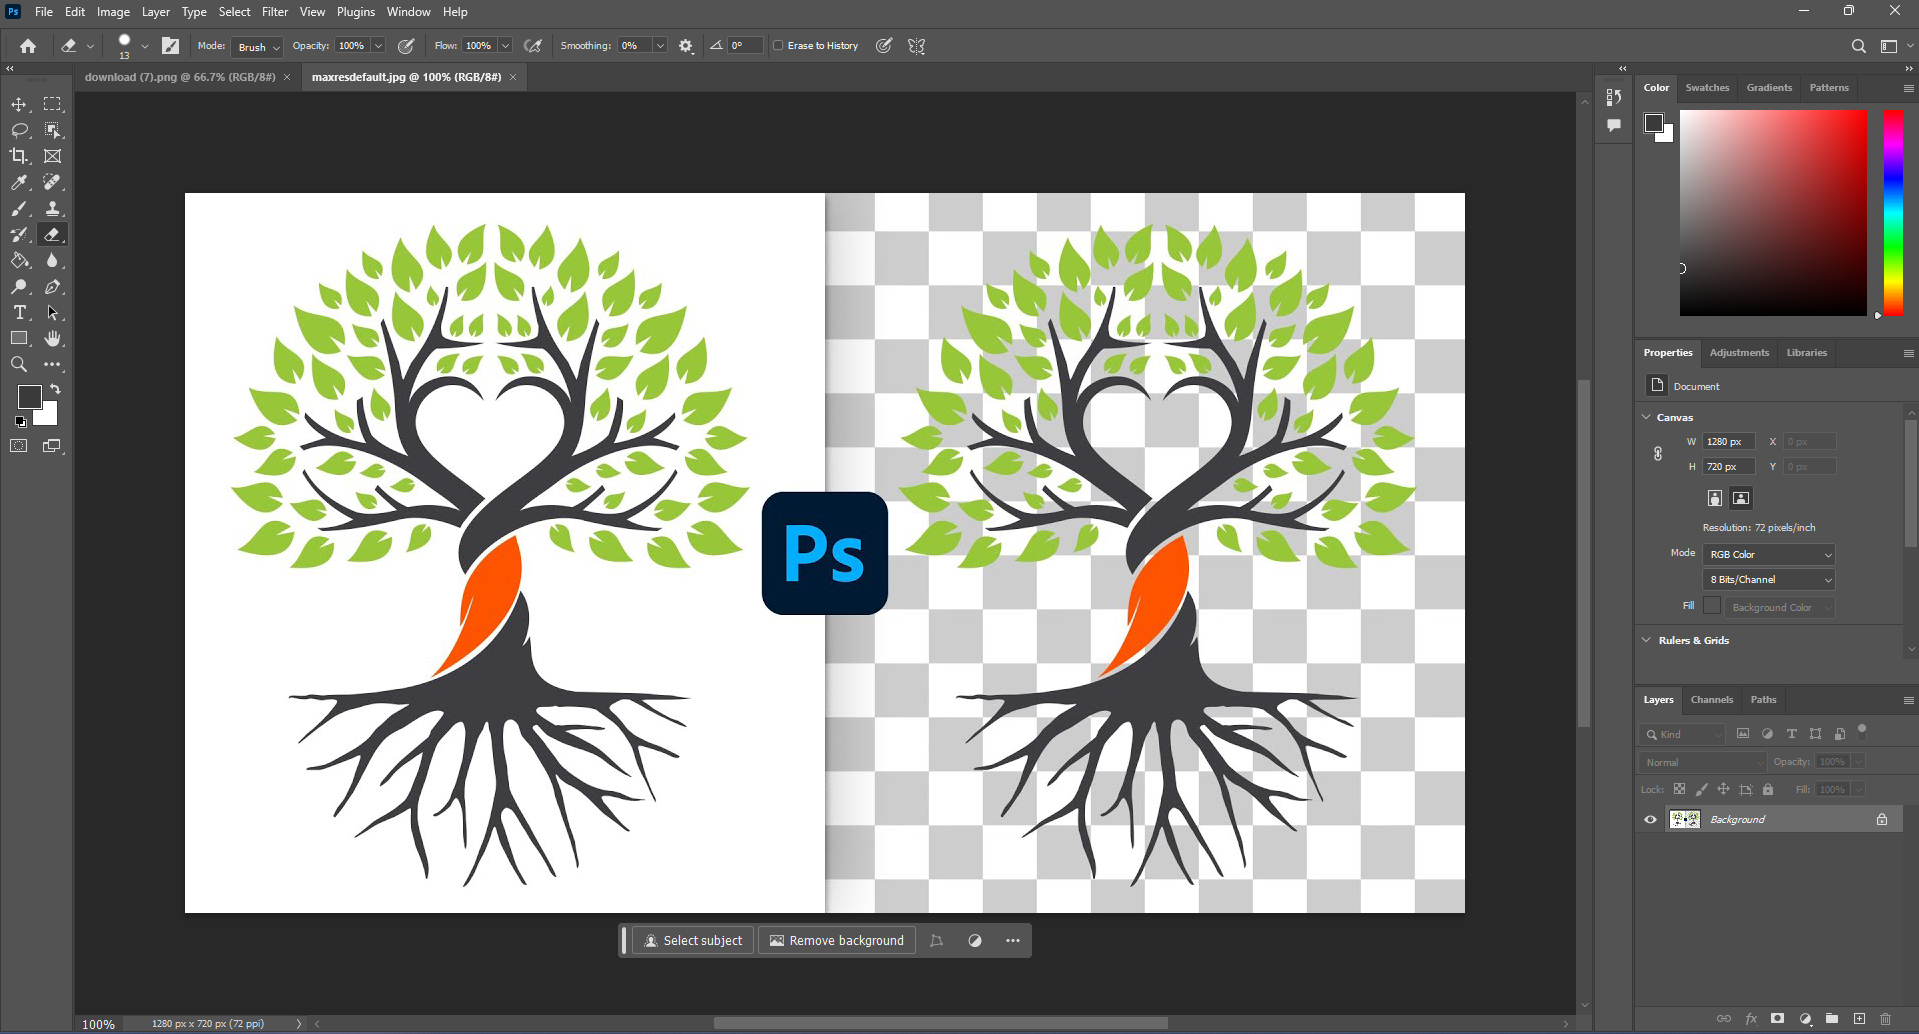
Method 1: The “Quick Actions” Approach (For Simple Images)
The newest editions of Photoshop boast a powerful “Quick Actions” feature that can remove a white background in a single click – perfect for simple images. Here’s how:
- Open your image in Photoshop.
- Navigate to the Layers panel (usually on the right).
- Double-check that your image layer is unlocked (a small lock icon next to the layer name indicates a locked layer). Right-click and choose “Unlock Layer” if needed.
- Head over to the Properties panel located above the Layers panel.
- Under the “Quick Actions” section, you’ll see a button labeled “Remove Background”. Click it!
Photoshop will analyze your image and attempt to create a selection around your subject, automatically removing the white background and turning it transparent.
Refining the Selection (Optional)
While “Remove Background” works wonders for simple images, it might not always produce a perfect cut-out. Some image editing company provide this service. Here’s how to refine the selection:
- Zoom in on your image using the zoom tool (magnifying glass icon).
- Use the Quick Selection Tool (brush icon with a dotted line) to paint over any areas mistakenly included or excluded in the selection. Hold the “Alt” key (Option key on Mac) to subtract areas and “Shift” key to add areas.
- The Refine Edge tool (brush icon with a gear icon) offers more precise control. Experiment with settings like “Smooth,” “Feather,” and “Shift Edge” to achieve a clean border.
Method 2: The Magic Wand Tool (For Defined Edges)
The Magic Wand tool is a classic for selecting areas based on color similarity. Here’s how to use it for white background removal:
- Open your image and ensure the background layer is unlocked.
- Select the Magic Wand Tool (wand icon).
- In the Options bar (above the workspace), adjust the Tolerance setting. A higher tolerance selects a broader range of similar colors, while a lower tolerance selects more specific shades. Experiment to find the sweet spot.
- Click on the white background to create a selection. If unwanted areas are selected, hold “Shift” and click to deselect them. Alternatively, hold “Alt” (Option key on Mac) to add them back to the selection.
- With the white background selected, press Delete to remove it.
Method 3: The Magic Eraser Tool (For Well-Defined Objects)
The Magic Eraser tool works similarly to the Magic Wand but focuses on contiguous areas. Here’s how to use it:
- Open your image and unlock the background layer.
- Select the Magic Eraser Tool (brush with an eraser on the end).
- In the Options bar, adjust Tolerance like in Method 2. Set Sampling to “Continuous” to erase connected white areas.
- Click on the white background to erase it. Be cautious near your subject’s edges to avoid accidentally erasing parts of it.
Method 4: The Channels Panel (For Complex Images)
While the Magic tools work well for basic backgrounds, the Channels panel offers more control for complex images. Here’s a breakdown:
- Open your image and unlock the background layer.
- Navigate to the Channels panel (usually beside the Layers panel).
- Each channel represents color information (Red, Green, Blue). Often, the white background will be most prominent in one channel. Analyze which channel shows the most contrast between your subject and the white background.
- Hold down “Ctrl” (Command key on Mac) and click on that specific channel’s thumbnail to create a selection based on that channel’s information.